Hayley's Herb-alicious Bread!
If you enjoy going out to dinner and nomming on the bread platter because they put those yummy herbs in them then you are going to love this bread. Fans of garlic and herb bread will find themselves serving this as a side with more than just pasta. It makes a tasty sandwich, accompanies risotto well, and can be enjoyed toasted with some butter.
This recipe makes 2 loaves of bread or about 18-20 dinner rolls. Waiting for the bread to rise: 2 1/2 hours. Baking: 80 minutes (depending on loaf. See steps 5-7 and Additional Tips below)
As always, please consider making a donation here if you enjoy my recipes.
Herbalicious Bread

Tools
- Kitchen scale
- Large bowl
- Hand mixer with bread hook attachment (or stand mixer with bread hook)
- Measuring spoons
Ingredients
- 500g strong bread flour
- 1 ½ packet instant yeast (about 12g)
- 2 teaspoons salt
- 300-350ml cold water
- 2 ½ tablespoons olive oil
- 2 teaspoons garlic powder
- 1 teaspoon smoked paprika
- ½ teaspoon white pepper
- ½ teaspoon fresh ground black pepper
- 1 ½ teaspoons dried chives
- 15 fresh basil leaves, finely chopped (sub 1 tablespoon dried if you don’t have fresh)
- *Optional Ingredients: 2 teaspoons each of Oregano & Thyme

Directions
- Put the flour into a large bowl with the salt on one side of the bowl and the yeast on the opposite side. Putting the salt and yeast on opposite sides prevents them from reacting with each other before you are ready to knead. It also prevents the salt from killing the yeast and hindering your rise. Add spices, herbs, and olive oil.

- Using the dough hooks, turn the mixer on low to begin kneading the ingredients together. Slowly add the water while the mixer brings everything together. Make sure if you are using a hand mixer to move it around the bowl so you get all the flour from the sides. Start by adding 300 ml of water and if it looks like you need more (if some of the flour refuses to be incorporated), then add a little more, but don’t exceed 350 ml or the dough will be too wet. If the dough looks too wet, add a little more flour to the dough to thicken it up. You can tell if the dough has too much water if the dough doesn’t start to take shape or if it sticks to the dough hooks or the sides of the bowl too much.
- Knead with the dough hooks for about 5 minutes. Once the dough has come together (it should form somewhat of a ball on its own after kneading with the bread hooks), tip the dough out onto a lightly floured surface and knead by hand for about 5 more minutes. (I’ve also been a bit lazy and continued to knead it right in the bowl. Just add a little flour to your hands and the dough and you should be fine.) The dough should be elastic-y.

After kneading by hand - Return the dough back in the bowl. Put the bowl in a large plastic bag and make sure it is secure so no air get to it (a clean, small trash bag works well to cover the entire bowl so no air gets to it). Leave the dough to prove for 1- 1 ½ hours or until doubled in size. Dough should be puffy and spring back when you poke it. (I usually need the entire hour and a half).

Dough after rise #1 - Tip the dough onto a lightly floured surface and knock the air out of it. Knead the dough by hand for about 5 minutes then shape it. *If you plan to plait your bread, I’ve found that separating the dough into two provides you with two decently sized loaves. I’ve done a two strand plait and a three strand plait before, but you feel free to be as creative as you like! Also, when I plait my bread I just put it on a silpat with no oil. Not using a pan will also change the bake time. It will brown faster because the heat does not need to penetrate the pan before it gets to the bread. Keep an eye on it, but you can probably shave off about 5 minutes from your cooking time.

Look how large! - *If you’re using a bread tin (you will need 2 x 1 pound tins): Lightly oil the baking pan you are going to use. Place the dough into the lightly oiled pan. Put the pan with the dough back into the plastic bag and let it prove for 1 hour.

Going into the bag for prove #2 
After rise #2

After rise #2 (1lb bread tin) - Preheat the oven to 400° Fahrenheit. Bake the bread for 40 minutes. Reduce the oven temperature to 375° Fahrenheit and bake for a further 20 minutes. Turn off oven but leave the bread in the oven (with the door closed) for a further 20 minutes. Remove the bread from the oven and let it finish cooling on a wire rack. Take it out of the tin, if using, to finish cooling. A plate will work fine if you don’t have a wire rack. Enjoy!
Hot out of the oven


Since you're here: Leave me comment & show me your creations. I hope you find all of my goodies enjoyable. If you find my kitchen creations inspiring, consider making a donation here so I can keep providing everyone with free, inspirational recipes.
How did your bakes go? Find me on Instagram @superhayleykaystuff and tag me to show me your bakes!
Additional Tips
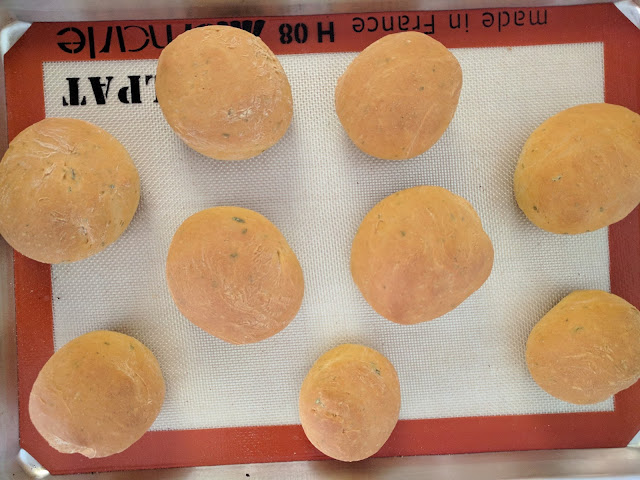
In this post I made bread rolls as well as a loaf. For the bread rolls I baked them at 400 Fahrenheit for 40 minutes then I took them out of the oven and let them cool. When I cracked it open the outside was crispy and the inside was soft and fluffy=perfect!
Additional Tips
In this post I made bread rolls as well as a loaf. For the bread rolls I baked them at 400 Fahrenheit for 40 minutes then I took them out of the oven and let them cool. When I cracked it open the outside was crispy and the inside was soft and fluffy=perfect!
Comments
Post a Comment