Hayley’s Citrus
Drizzle Cake
I love citrus cake, but when I first made one from a recipe I found online I found it didn't have nearly enough lemon flavor because most of it had been baked out. I added more citrus and then tinkered with the other ingredients to balance out the consistency a bit.
This recipe is full of flavor, but not overly lemony (I know you don't want it to be too tart, but you still want to taste the lemon, yes?). Also, this recipe guarantees a fluffy cake mix that is very airy and has a nice soft texture after it is baked. The cake can be made with the citrus fruit of your choice.
Coming Soon: I'm going to MIX IT UP! Get familiar with this recipe because my upcoming cook book will include two ways to Mix It Up. Want a hint? A royal wedding inspired mix, a fall inspired mix, and a winter inspired mix. XXX
Ingredients (Citrus Cake)
- 115 grams of butter (1 stick will work fine) + more for greasing the pan
- 130 grams superfine granulated white sugar (¾ cup)
- 2 large eggs
- 2 medium to large blood oranges*
- 210 grams all-purpose flour (about 1 ½ cups)
- 2 teaspoons baking powder
- 2 tablespoons whole milk
Ingredients (Citrus Drizzle)
- 50 grams confectioner’s sugar/powdered sugar (about ¼ cup)
- 1 teaspoon water
- Zest from the citrus fruit you are using
*You can feel free to substitute oranges or grapefruits for the
blood oranges. If you choose to go with lemons or limes, I suggest using
3 of them since they are smaller. I’ve only made the cake using blood oranges
and lemons.
*Makes enough for one 8-inch cake, or two 6-inch cakes, or about 14 cupcakes.
*Makes enough for one 8-inch cake, or two 6-inch cakes, or about 14 cupcakes.
Tools
- Stove & Small pot
- One 8-inch cake tin or two 6-inch cake tins
- Electric hand mixer with beater attachment (for mixing the cake) and balloon whisk attachment (for the glaze). (I use KitchenAid and mine look like the ones pictured below).
- Zester
- Citrus juicer


Directions
Cake should be fluffy and full of flavor.
- Preheat oven to 350° Fahrenheit. Line the bottom of the cake tin with a non-stick parchment paper. You can find these precut into circles to make it easier to line the bottom of your tin. Butter the sides of the tin. If you are not using non-stick parchment paper lining then just butter the bottom of the pan.
- Zest all of one blood orange and half of the other blood orange over a medium mixing bowl. Zest the remaining half of the blood orange into a large mug and set aside for later to make the glaze.

- Juice both of the blood oranges and put the juice in a small pot. Heat the juice over medium heat until it starts to show a rolling boil. Reduce heat to low and let simmer until the juice becomes thicker, more like syrup, while stirring every few minutes.
- Cut the butter into smaller chunks and put into a microwave safe mug. Microwave for about 10-15 seconds until the butter is softer and slightly melted. Then, add the butter to the bowl with the zest. Add the sugar to the butter and zest and mix on low speed for about 2 minutes or until the butter and sugar are well mixed. Add the eggs and beat on medium speed for another 2 minutes.
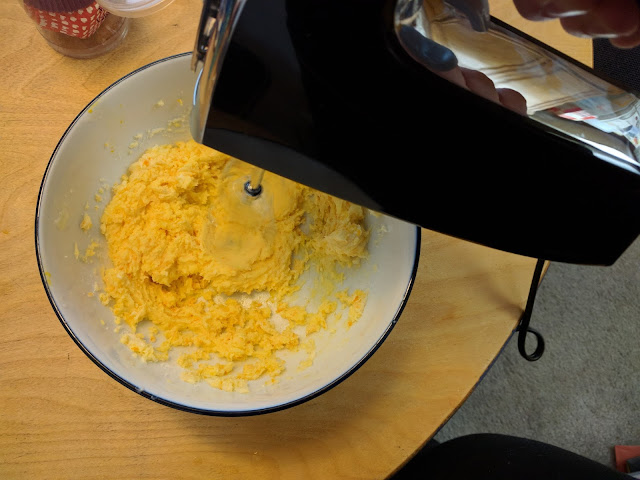
Before the eggs
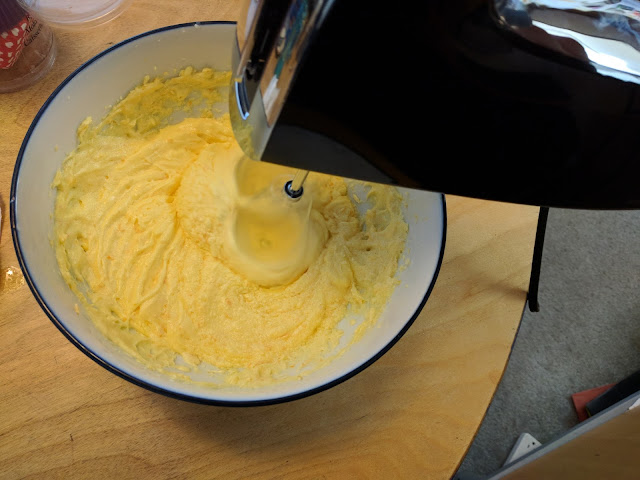
With the eggs
- Take the blood orange syrup and put ½ tablespoon into the cup with the remaining zest. Set aside.
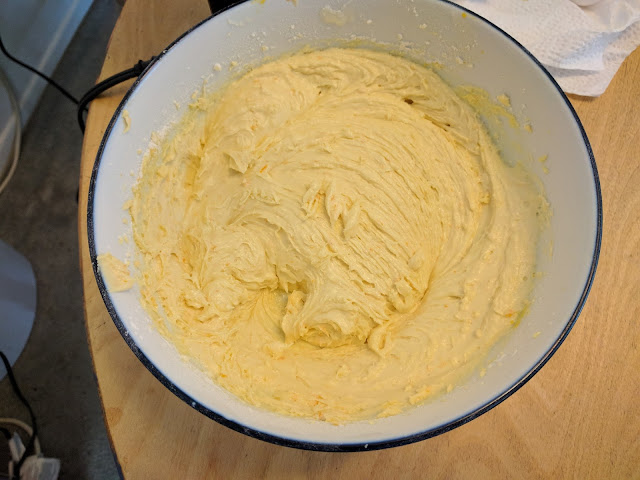
- Add the flour a little at a time mixing after every addition, saving about ½ cup. With the last ½ cup of flour, add the remaining blood orange syrup, baking powder, and milk to the cake mix and mix well on medium speed for about 3-4 minutes. The cake batter should be very fluffy looking.
After all in ingredients are mixed in. - Pour the cake batter into the prepared cake tin. Use a spoon to smooth the batter out if needed.

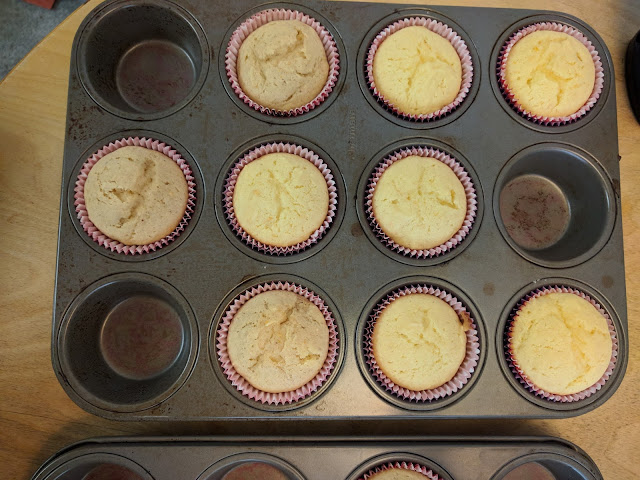
Close up of cake batter. It should be fluffy, not runny. - For an 8-inch cake tin, bake for 30 minutes. For a 6-inch cake tin, bake for 22-25 minutes. For cupcakes, bake for 11-13 minutes.
- *While I have used this recipe to make two 6-inch cakes, I only have one 6-inch tin. The baking time for the 6-inch tin above are based on me baking each cake individually. If you have two 6-inch tins make sure you bake both cakes on the same rack for an even bake. However, your baking time may be longer if you are baking two cakes at once.
- While the cake bakes, return to the glaze. In the mug with the zest and the blood orange syrup, add the water and the powdered sugar. Using the balloon whisk attachment, mix ingredients together for about 30 seconds.
- When cake is finished, let cool for 1-2 minutes and then remove from the cake tin to let it cool completely. Using a spoon, add the glaze to the top of the cake.
Hot out of the oven
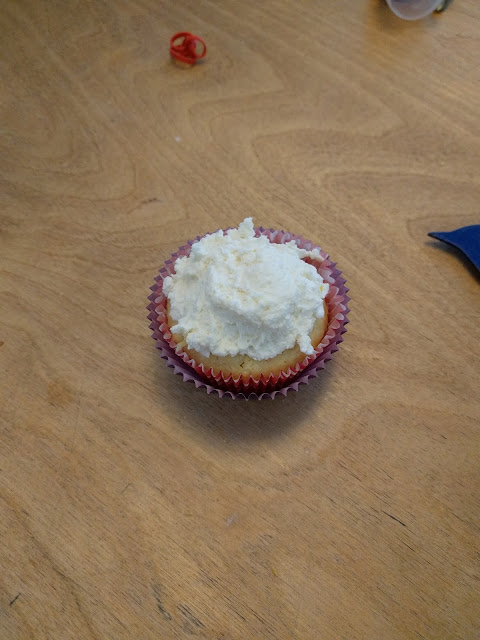
I topped these with some lemon whipped cream instead


Cake should be fluffy and full of flavor.
Bonus Ideas:
- If you are making cupcakes, use a cupcake corer and add some lemon curd to the center.
- Top with citrus whipped cream frosting instead of the drizzle glaze. Just use the zest you would have used for the drizzle and put all of the syrup in the cake instead of the frosting.
- Don't toss the citrus peel even after you've zested and juiced it. It's a great addition to tea!
Post updated 9/13/2017 to add pictures and clarify directions. Original post 4/24/2017
Comments
Post a Comment